How to set up multi-factor authentication in O365
Posted on 4 June 2021 by Beaming SupportMulti-factor authentication (MFA) is a way to add an extra layer of security to all kinds of accounts, and we recommend enabling it on Office 365 to help keep business data data secure.
This guide should help you decide which method of MFA available in Office 365 would be best suited to you, and then set it up successfully.
You can read more about why we need multi-factor authentication in this guide to MFA.
How to set up telephone or mobile app multi-factor authentication in O365
Once your IT team has set up multi-factor authentication for your Office 365 platform you will be automatically prompted to enable MFA and will be advised that this will become compulsory within 14 days.
Follow the steps below to finish the set-up, using the method that best suits you.
1. When you next open Outlook or sign into office.com you’ll be prompted to complete the set-up of MFA within 14 days. When this happens, press the “Next” button.
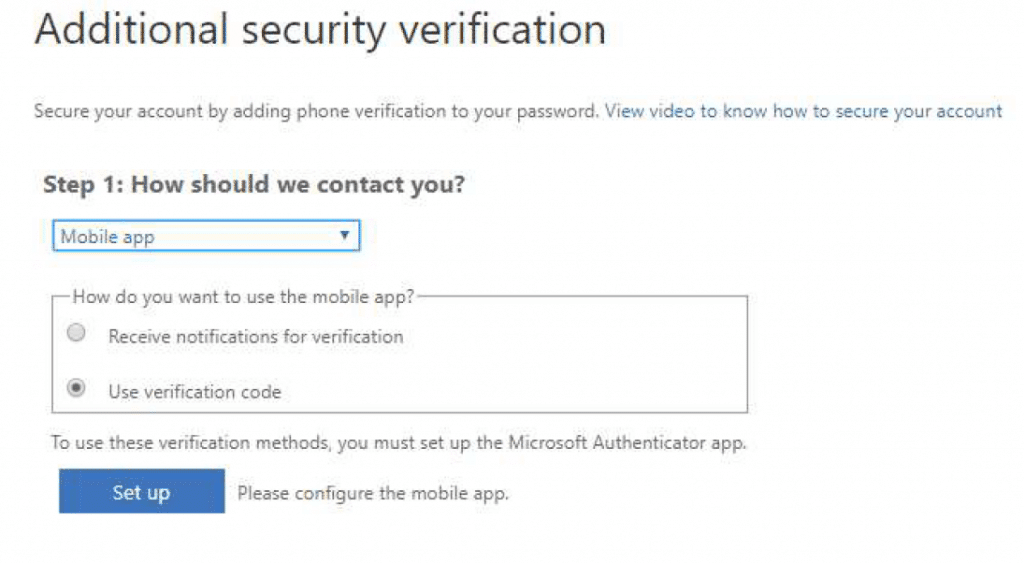
2. Now you have been directed to the setup wizard for MFA and will be presented with the below options.
3. Here you can choose whether you prefer to receive a verification code via the mobile app or a telephone call. Choose the method you’d like to use and then go to step 4a for the telephone call option or to 4b for mobile app set-up.
4a. If you chose the option for the “Telephone call”, then you will simply be asked for your mobile number and then asked to press “Call Me”.
NOTE: When you receive the telephone call, you will be asked to press the “Pound” key, for English users this can be confusing, but the button you should press is the hash key (“#”).
With that done you will be able to press “finish” on your computer and set-up is complete.
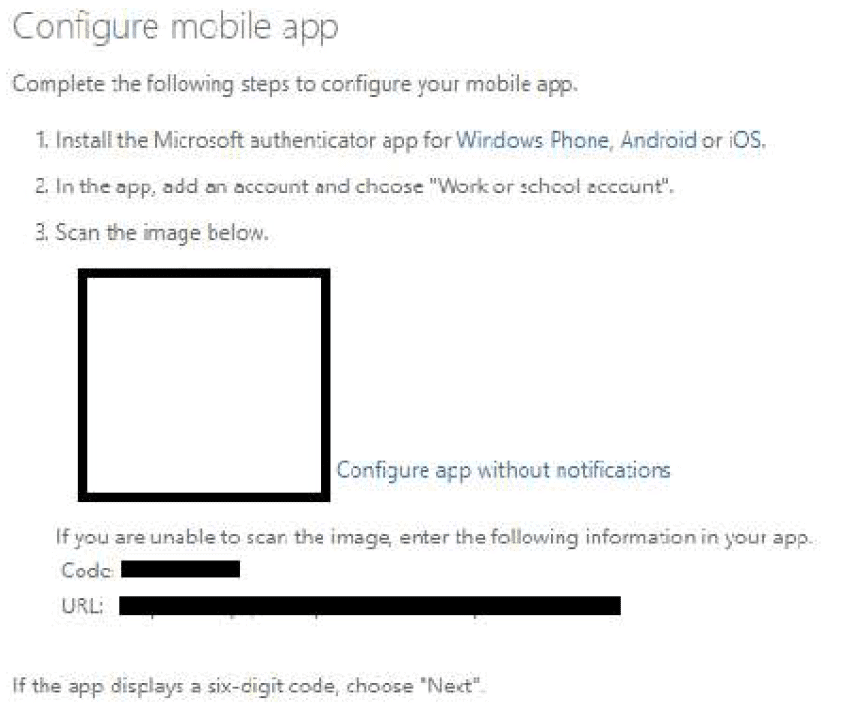
4b. If you choose the mobile app, you will be presented with the below screen.
NOTE: If at any point you are presented with an “app password” please make a note of this and keep it safe, as you will need this to use Outlook on your PC.
Install the Microsoft Authenticator app to your mobile. You can do this by going to App Store (Apple), Google Play (Android) or the Microsoft Store (Windows phone) and searching “Microsoft Authenticator App”. Help can be obtained by clicking your phone type in the step 1. part of the instructions on screen.
Once installed you will then be able to press the “+” button in the app and select “Work or school account”, if you are asked to allow the camera, please press “OK” and then scan the QR code. We’ve blanked this out in the image above, but it will appear under “scan the image below” on your PC/laptop screen.
Step 5 and onwards will only apply to Microsoft Authenticator app users. If you’ve chosen to use telephone call authentication, your set-up is complete.
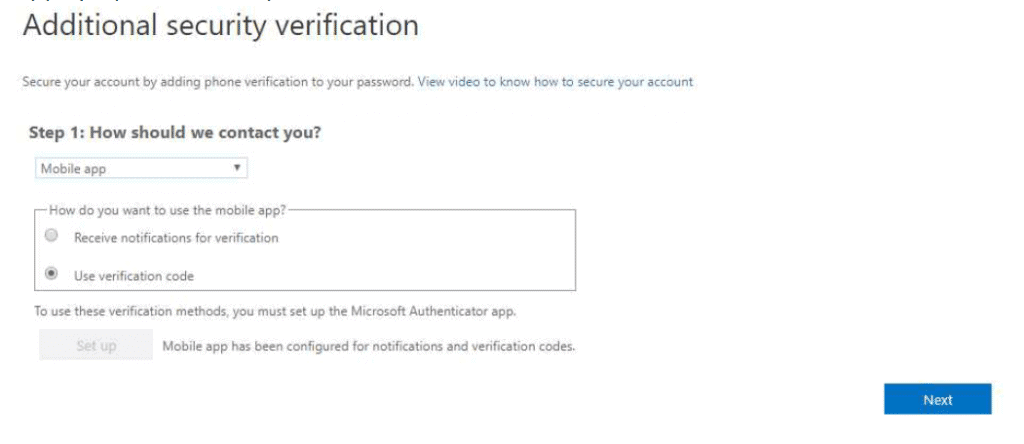
5. Now you have scanned the QR code, you will be asked “how you want to use the mobile app” (as per the below).
Please select the “use verification code” option and press Next
6. When prompted, enter the verification code currently showing on your mobile phone app (this will change every 30 seconds). And press “verify”.
7. On the next screen, you will be asked for your mobile number just in case you were to ever lose access to the app, choose your region and enter your mobile number and then press “Next”.
8. This is where you will now be prompted with the “app password”, please keep this safe as you likely need it to access the apps on your PC, then press “finish”.
When the above is complete and you have chosen the verification option best for you, the next time you log into office.com or you use Outlook on your laptop/desktop, you will be prompted to authenticate using the verification method you have selected, either pressing the “#” via the phone call, or inputting your 6 digit verification code from the mobile app.


